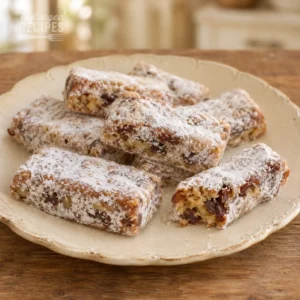
Susan Williams’s mother made these Date Nut Bars every year, and her handwritten card still holds the detail that gives them their texture. She wrote “Beat thick” beside the three eggs, a short instruction that gives the batter a light base for the chopped dates and nuts. The dates soften in the oven and leave sweet, chewy pockets throughout the bars, while the nuts add a little crunch. Vanilla rounds out the flavor, and the top turns lightly golden as the batter sets. Once cooled, the bars slice neatly into small pieces that fit on a cookie tray, tuck into a gift tin, or go alongside a cup of coffee. The card even carries two baking-time notes, one in the corner and a shorter one beside it, a small detail from a recipe that saw regular use.
Ingredients
- 3 eggs
- 1 cup granulated sugar
- 1 tsp vanilla extract
- 1 cup all-purpose flour
- 1 tsp baking powder
- ¼ tsp salt
- 1 cup walnuts (or pecans, chopped)
- 1 ½ cups pitted dates (chopped)
- ½ cup powdered sugar (for rolling)

Instructions
Step 1: Prepare the pan
- Heat the oven to 350°F.
- Line a 9 × 15-inch baking pan with parchment paper, leaving enough overhang to lift out the bars.
Step 2: Beat the eggs
- Beat the eggs until thick and pale.
- Gradually beat in the sugar, then mix in the vanilla.
Step 3: Mix the batter
- Whisk the flour, baking powder, and salt together in a separate bowl.
- Fold the dry ingredients into the egg mixture just until no dry streaks remain.
- Fold in the chopped walnuts and dates, breaking up any clumps of dates as you go.
Step 4: Bake the bars
- Spread the batter evenly in the prepared pan.
- Bake for 30 to 35 minutes, checking at 25 minutes because the card also includes a shorter baking-time note.
- Take the pan out when the top is lightly golden, the center is set, and a toothpick inserted into the batter comes out with a few moist crumbs.
Step 5: Cut and roll the bars
- Let the baked slab cool until it’s firm enough to slice.
- Lift it out of the pan using the parchment and cut it into 24 bars.
- Roll each bar in powdered sugar to coat all sides, just as Susan Williams’s mother did.
Tips
- A hand mixer makes it easier to beat the eggs until they fall from the beaters in a thick ribbon.
- Reserve a spoonful of the measured flour to toss with the chopped dates if they stick together.
- Use pecans in place of walnuts for a milder, buttery flavor.
- Toast the nuts lightly and let them cool before folding them in for a deeper flavor.
- If using a 9 × 13-inch pan, expect thicker bars and allow extra baking time if the center still looks wet.
- Use a sharp knife and wipe it between cuts for clean edges.
- Bake the bars a day ahead and store them in an airtight container once cool. If you stack them, place parchment between the layers.
Nutrition
Calories: 108kcalCarbohydrates: 17.6gProtein: 2gFat: 3.9gSaturated Fat: 0.5gPolyunsaturated Fat: 2.6gMonounsaturated Fat: 0.7gCholesterol: 23mgSodium: 51mgPotassium: 86mgFiber: 1gSugar: 13.1gVitamin A: 34IUVitamin C: 0.1mgCalcium: 23mgIron: 0.5mg